
Designing a Machine-Knit Sweater
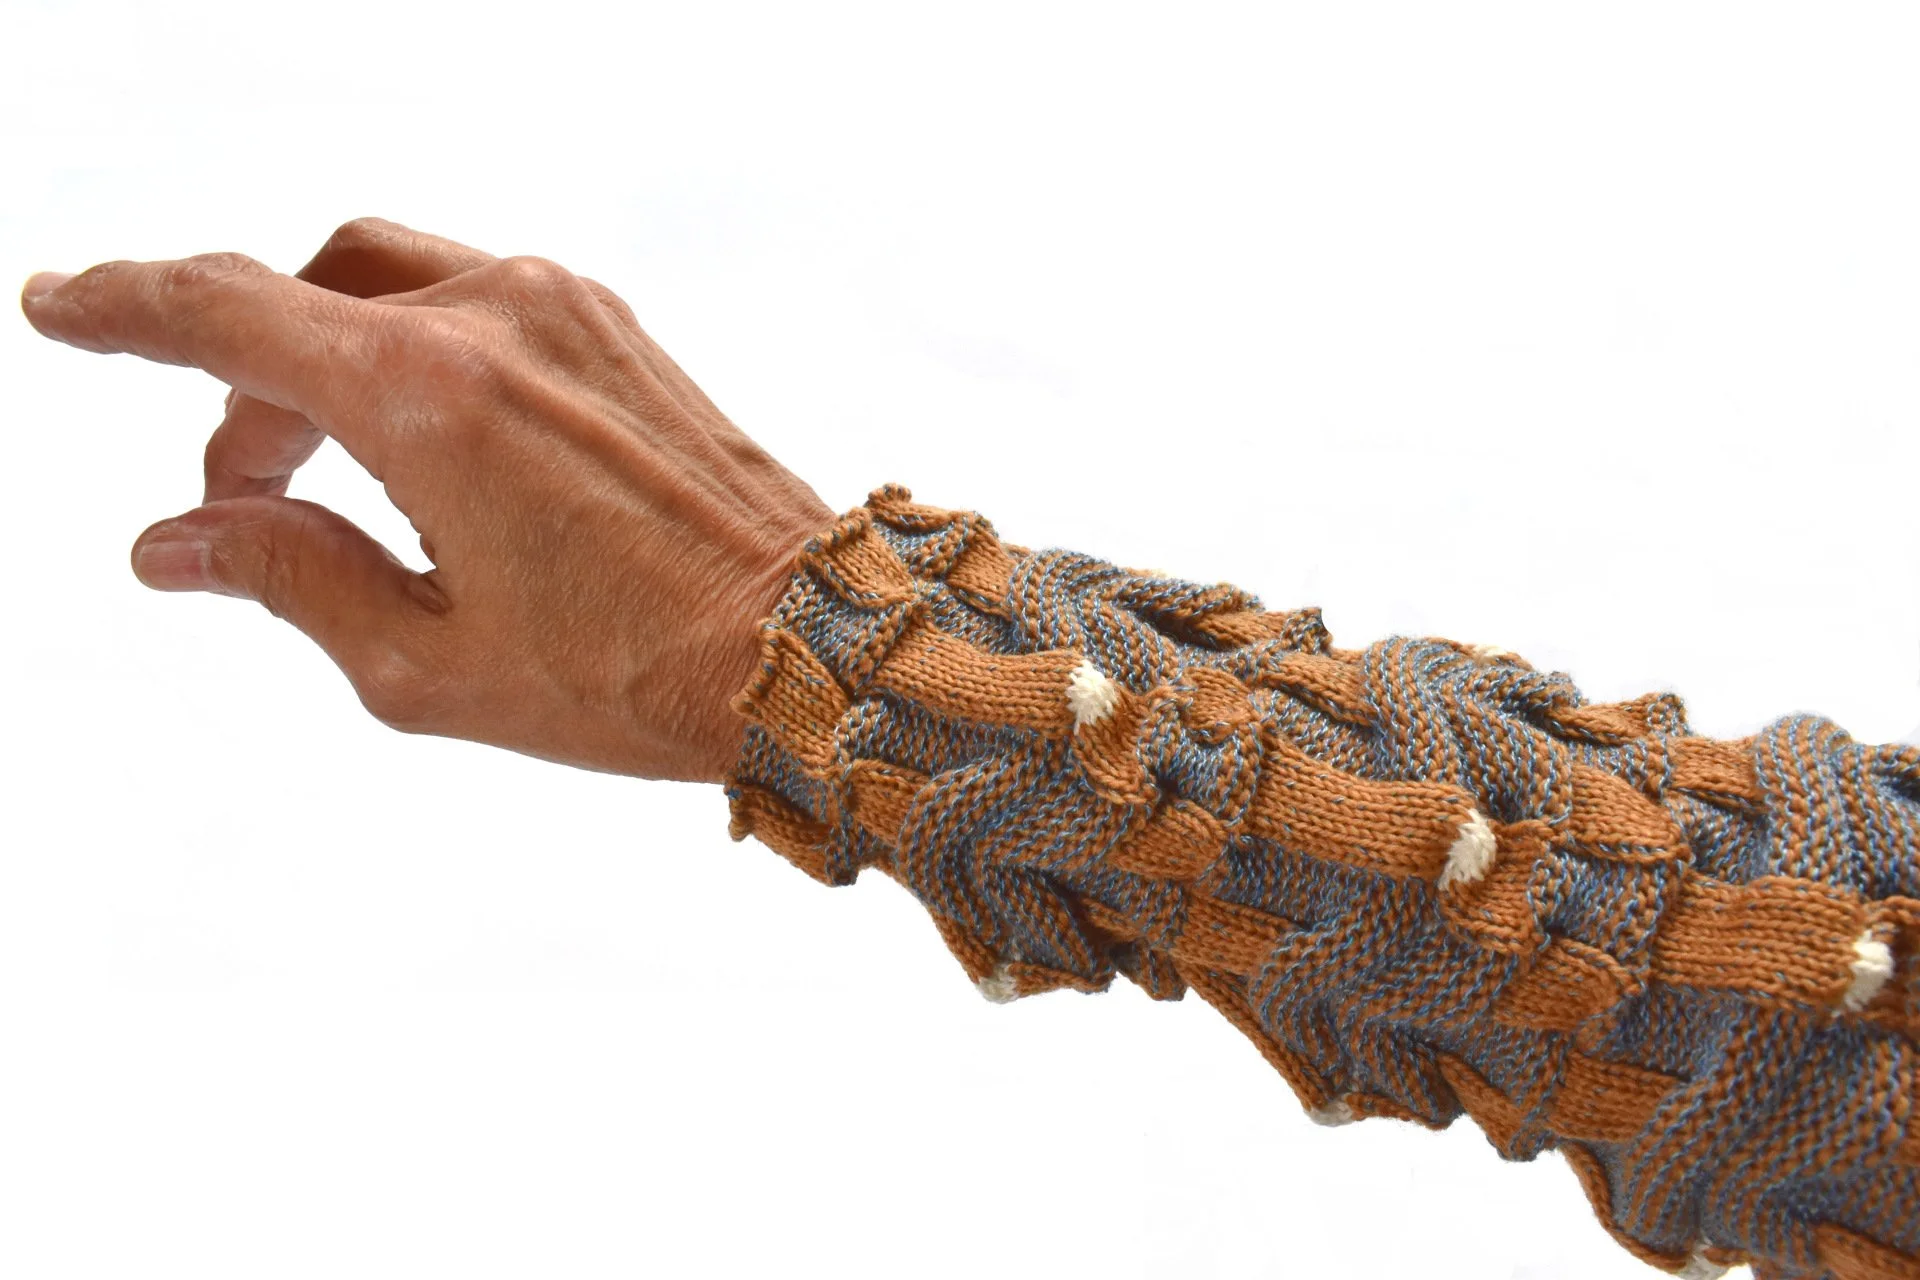
A sample swatch is wrapped around my forearm; I’m designing a cardigan. The video below presents my outline for developing a pattern for this personal project.
If you enjoy this type of content, I invite you to subscribe to my YouTube channel.
Related Links
Request a live Kniterate virtual demo [from me!]
Purl Knit or Links-Links and What’s a Horizontal Rib? [previous post and video describing this fabric]
Integrating a Stitch Design and Exporting a Text File from DAK [from Session 4, Designing with Kniterate — Decreases, Increases, and Shaping a Sweater]
Video Transcript
I’m about to share my four steps for designing a machine-knit sweater pattern. And I’ll tell you about the issues I’ve had designing my future cardigan.
Hi, Olgalyn here!
As some of you may already know, the starting point for me isn’t “I want to design a cardigan jacket.” It’s “I want to explore this fabric.” And that’s step 1, choose a texture or technique to explore.
Inspiration can be found in other knitted stitch patterns or in completely different structures. You may be inspired by a print fabric pattern or a structure found in nature or architecture. In this case, I explored a purl knit or links-links knit structure. I described this type of fabric in my previous video.
As you can see, the purl knit properties differ from jersey, visually and mechanically. Before thinking about the shape of my future sweater, I spent time understanding how this stitch pattern knits, how stable or unstable it is, and how it responds to handling.
That means swatching, swatching, swatching. That’s the second step, knit and test the swatches.
And it isn’t just about gauge at this point — it’s about fabric behavior. Purl knit fabrics stretch differently and drape differently than other types of knits.
I tested variations of the stitch size, tension, and yarn choice. And I washed and dried the fabric. Once I had something I liked, I calculated the gauge. And I imagined the fabric as a garment. From my last blog post and video, interestingly, I received email and a comment from people who also imagined the fabric as a cardigan jacket. And another commenter helped me make a final decision on the colors. Thank you!
I'll be knitting the cardigan on the Kniterate, so I worked in the Kniterate design app and test-knit the various settings for increases and decreases. Here's my test for binding off. You can see how the machine binds off stitch by stitch. Here are my decreases and increases.
Because the fabric is so highly textured. I’m using simple edge decreases and increases. No one would see fully fashioned shaping with this texture!
(The transcript continues below the image.)
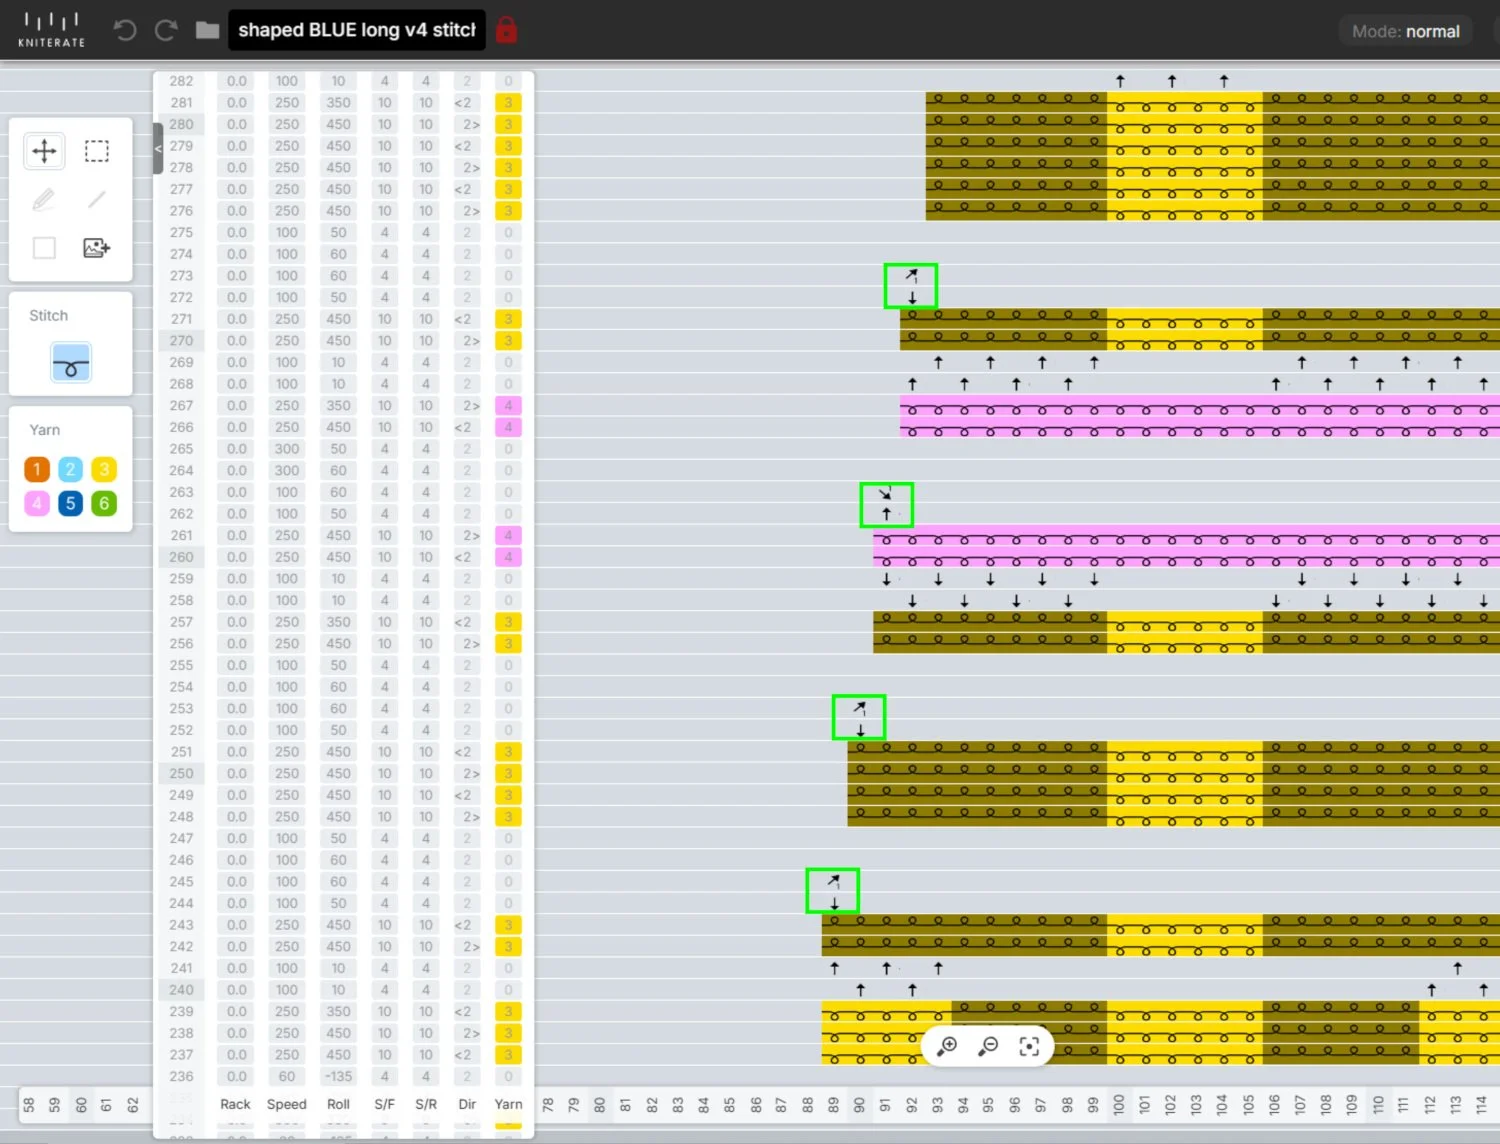
Simple edgle decreases are highlighted. Stitch transfers between knitting beds are also shown.
There are several ways to design a garment. Some designers start with a sketch and the shape of a garment, then they'll swatch to find a stitch structure that works.
I prefer starting with the swatch, so my next step is the sketch. It could have been a rough sketch, but for this project, I made a colored flat drawing, taking advantage of my previously taken videos of the swatch.
I did these flats in Inkscape. Many people use Illustrator. My flat drawings are very quick, very 2D with no hint of drape. But I want to get ideas for the general shape of the garment and to see how the stitch pattern works the shape.
I’m planning a v-neck with set-in sleeves for this cardigan. I’ve decided to use both sides of the fabric. The technical face, the side with the most knit stitches, will be used for the right front. I’ll use the reverse for the left front. The back is in two pieces and there are the sleeves. The back will be joined with a center gusset.
I like the bottom edge as is. And due to this fabric’s selvages, I will use a trim on the front edges. I’ll highlight the selvages in the back by joining them with the center gusset.
I'm using DesignaKnit for step 4, to create the technical design of the cardigan. This is where I had a few issues. I originally thought I’d be designing the cardi with raglan sleeves, since it’s easier to match a horizontal pattern through the body and the sleeves that way. Well, DAK doesn’t do a raglan the way I’m used to doing a raglan, and I didn’t want to knit a test to see if I wanted to use that method. I didn’t feel like digging up an old block pattern and translating it for DAK’s Original Pattern Drafting module, so I changed the pattern to set-in sleeves.
I don’t know. I may regret it, but it just seemed more straightforward at the time. I’m not sure how the pattern matching will turn out at the top of the sleeve cap, but we’ll see.
I’ve painted my stitch pattern in DAK. It’s the same stitch pattern you saw earlier in the Kniterate app, but without the transfers indicated. The transfers will be added when I’m back in the Kniterate design app.
When I'm not using DesignaKnit, I usually generate graph paper with a grid based on the gauge of my swatch. Then I draw my pattern directly on the graph paper and write all my increases and decreases directly on the full-size pattern paper.
Ok, back to DAK. Here are the pieces with the number of stitches and rows calculated. Since one of my front pieces is flipped. I'm actually knitting two fronts that are exactly the same. I’m also knitting two back pieces. Because the fabric pulls in so much, knitting the back in one piece is impossible, even on the machine with 252 needles per bed.
I’m thrilled I can export the pieces directly to the Kniterate design app, but I’m only exporting one sleeve for now. This is where I'll add the front-rear transfers command in order to transfer stitches between the beds, as needed. I'll also add the increases and decreases and free edit the removal on waste.
I'll knit one sleeve first just to double-check the gauge and everything else.
If there are any issues with gauge or shape of the sleeve, I’ll make the needed adjustments in DAK or in the Kniterate design app.
To review, the four steps are:
Choose a texture or technique to explore.
Knit and test swatches.
Create a sketch.
Create the technical design, based on your gauge.
Now knit a test piece or an entire proto-sample, if that's your thing. If necessary, get back in there and make adjustments.
If all goes well with my sleeve, I consider the major pieces of the pattern done. I’ll just need to knit them.
Because this is a personal project, I have the luxury of making certain decisions and changes later. I’ll probably experiment with the trim and closure once I’ve knitted the major pieces.
Next time you see me, I should of have a knitted sleeve and maybe a little more.
‘Til next time!
O!
If you’re a Kniterate user, you may be interested in my prerecorded Designing with Kniterate classes. If you’re not an owner yet, I’d be happy to give you a virtual tour of the machine.