
When Your Test Sample Says: Modifications Needed
If you’ve ever redesigned a garment because the fabric told you to, you’re in good company. Here’s an update to my current knitting project on the Kniterate.
The video details changes to my cardigan plans, including a new test sample and the design decisions that altered the sweater's shape. I tell what I learned from the test sample and describe the modifications to the neckline, sleeves, and general silhouette.
If you enjoy this type of content, I invite you to subscribe to my YouTube channel.
Related Links
Purl Knit or Links-Links and What’s a Horizontal Rib? [earlier post and video describing this fabric, including a tutorial]
Integrating a Stitch Design and Exporting a Text File from DAK [from Session 4, Designing with Kniterate — Decreases, Increases, and Shaping a Sweater]
Video Transcript
Last time I was here, I said, “Next time you see me, I should have a knitted sleeve and maybe a little more.”
Well, you can see me. And I don’t have a sleeve.
What I do have are a new test sample, updated cardigan plans, and a few design decisions that completely changed the shape of my sweater.
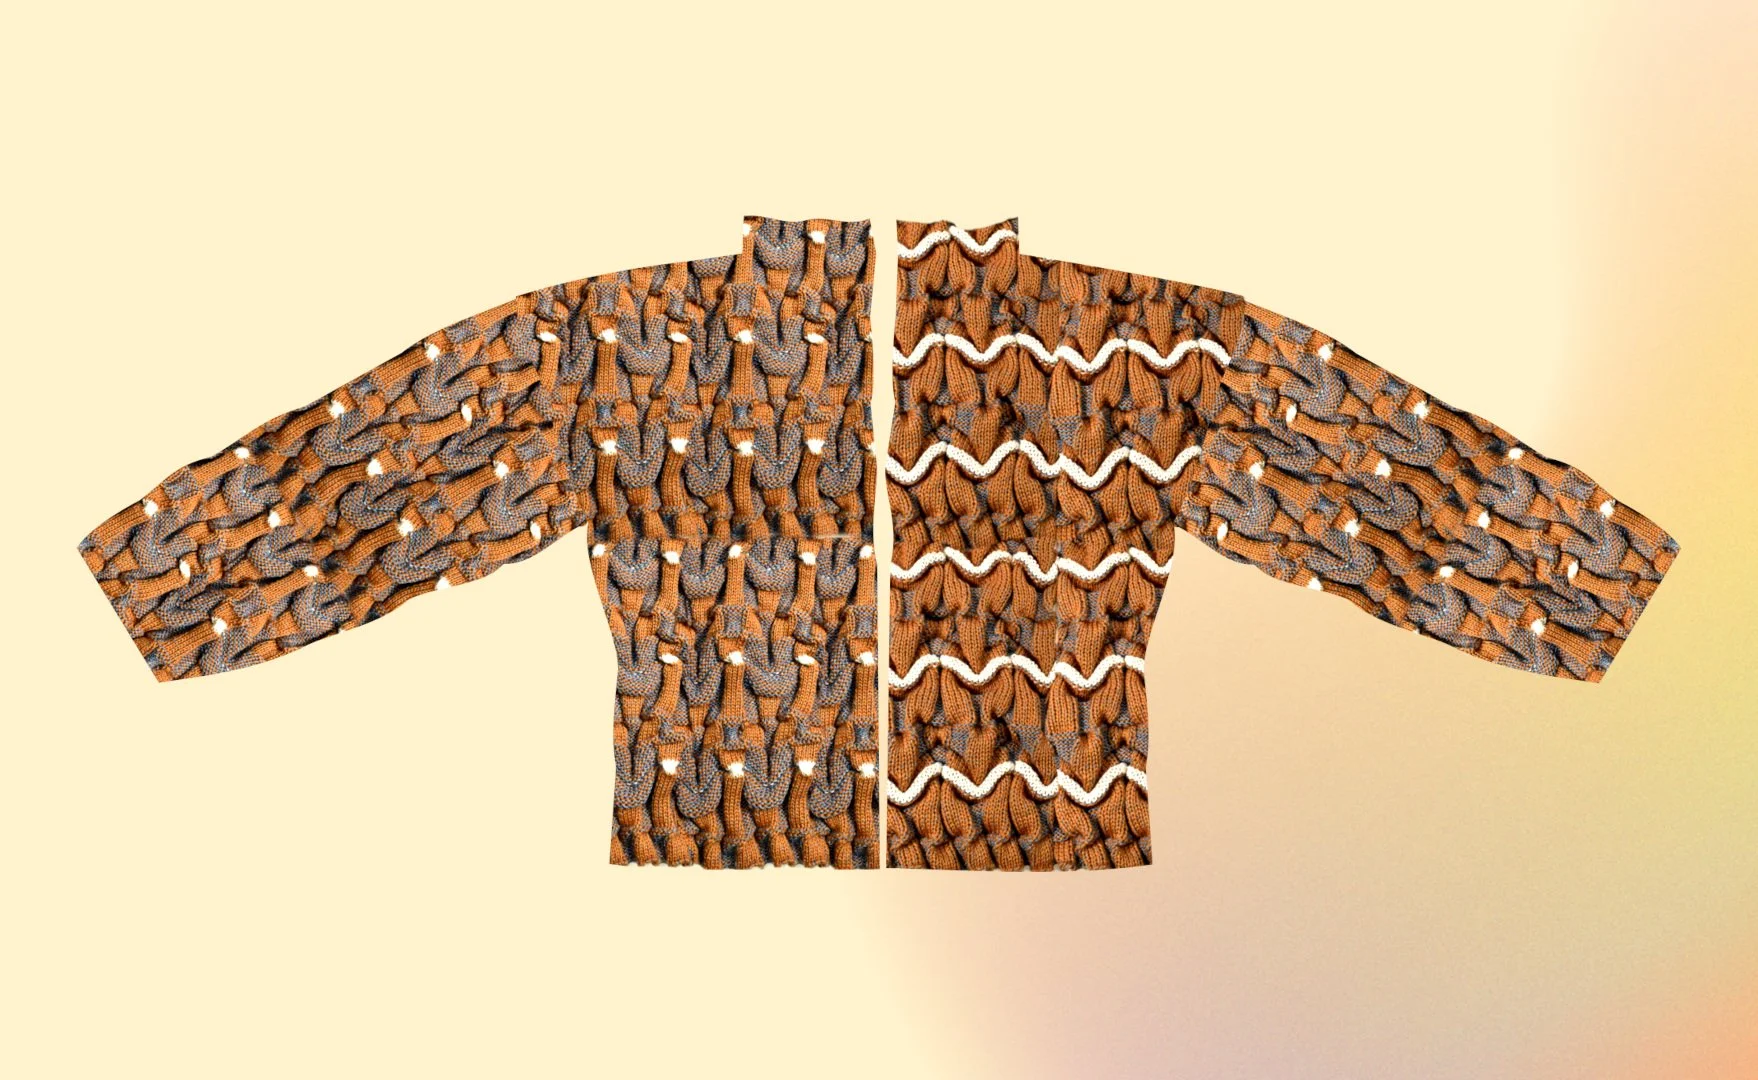
The cardigan I haven’t knitted yet went from this… to this.
In this video, I’m walking through why I changed the neckline, why the sleeves stopped being set-in, what I test-knit instead of a sleeve, and what I learned from that test sample, especially around short rows, transfers, and gauge.
If you like seeing how the properties of a fabric can drive design, keep watching.
Hi, Olgalyn here. When I went back and reexamined my earlier swatches, I realized how much I loved the way the top edge of the fabric forms scallops naturally. The stitch structure is doing real design work, and the top edge shouldn’t be hidden. Once I noticed that, the V-neck didn’t make sense anymore.
(The transcript continues below the image.)
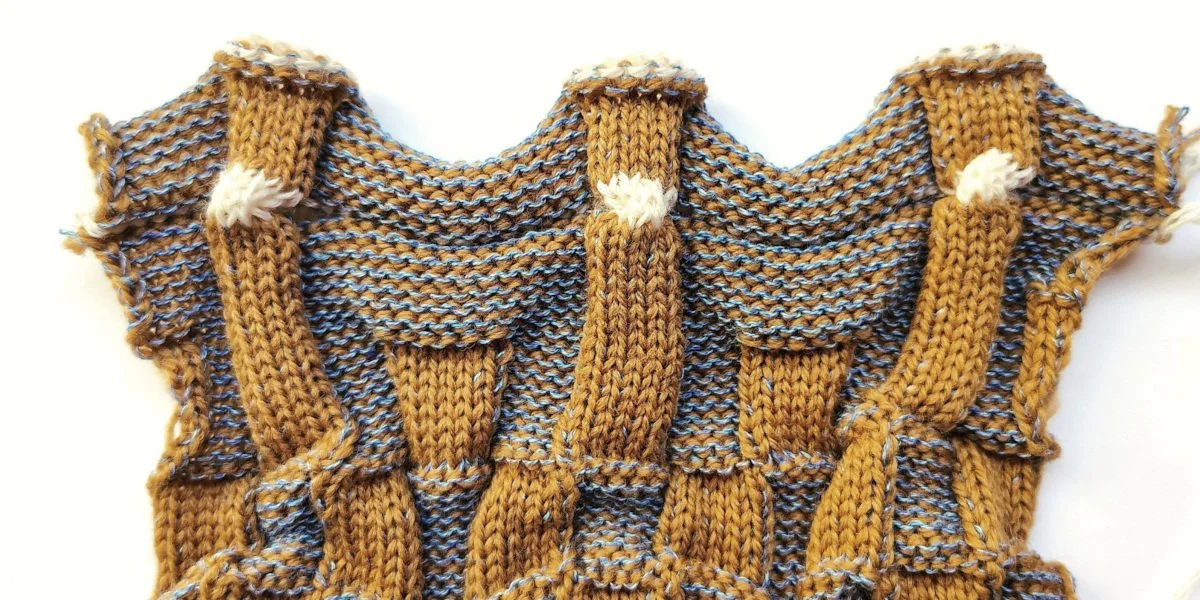
I wanted to use that scalloped top edge as a feature, so I changed the neckline to a funnel neck, and the scallops will show at the very top.
That decision came directly from the fabric, not from the original sketch.
Then I looked at the sleeves. The original plan was a set-in sleeve, and I wasn’t in love with it.
What I landed on instead is a baby dolman with a sleeve extension. The silhouette has a bit of an eighties feel. I still have real eighties sweaters that I knitted in the eighties, so I don’t know why I needed another one!
But more importantly, I felt the stitch pattern needed more space. I didn’t want it stretched and having the texture lose its depth. The bigger silhouette lets the fabric stay relaxed.
Even though I already had a test swatch and a gauge swatch, I still planned to knit a sleeve first, mostly to double-check gauge and make sure I programmed my increases and decreases correctly.
Then I realized I don’t need edge decreases at all with this design. What I actually knitted was a section with both increases and short-row decreases. That simplified the technical design more than I expected.
The test sample turned out well in most areas. Here I’m removing the waste yarn.
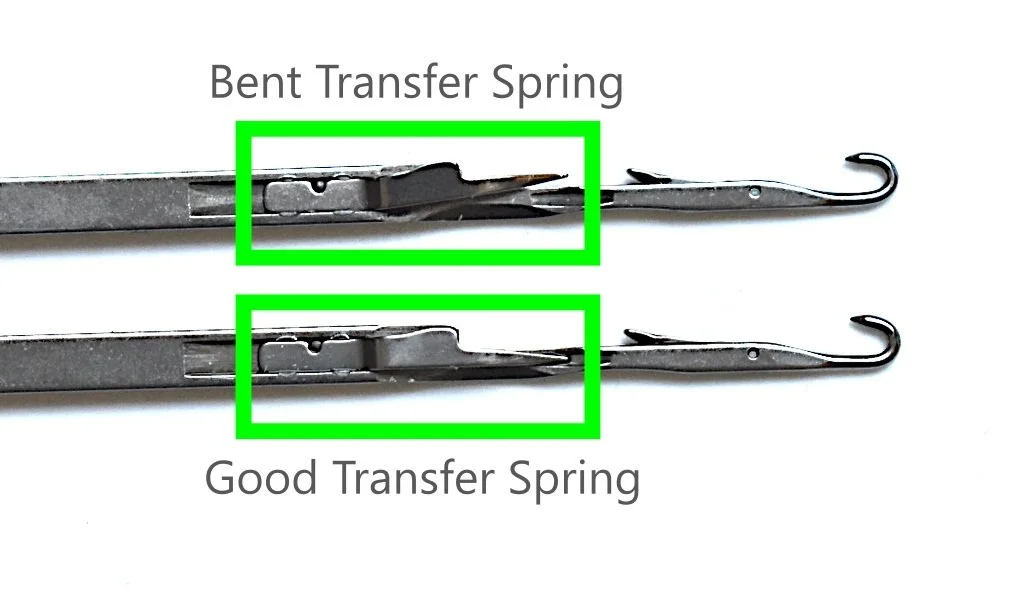
I was supposed to change a needle before I started. I already knew it had a bent transfer spring. It knitted the waste yarn just fine — no transfers there. But this stitch pattern uses lots of transfers. Fortunately, I caught it early and was able to change the needle without starting over.
If you haven’t come across a knitting machine needle with a transfer spring before, this is the part that enables automatic transfers on industrial machines and on the semi-industrial Kniterate.
(The transcript continues below the image.)
Simple edgle decreases are highlighted. Stitch transfers between knitting beds are also shown.
This piece right here is the transfer spring. When the needle holding the loop reaches its highest point, the hook on the opposite bed slips in and grabs that loop.
I’ve linked an animation in the description that shows the operation much more clearly.
Back to the test sample, I was really happy with the short-row decreases at the shoulder. And I’m glad I tested them, because I hadn’t actually tried short-row decreases with this stitch pattern before.
The bind-off settings also worked well. The Kniterate has a bind-off macro, so it’s usually just a few clicks and parameter entries to get a good result.
I did find one error. I forgot to transfer the last bind-off stitch into the funnel neck, but that’s easy to fix. And I’ve also decided to shorten the funnel neck slightly.
At this point, I’m sure of my gauge, and the shape makes sense. And I’ve troubleshot errors. If you saw my last video you know that now it's time for me to “get back in there and make adjustments.” So it’s back to DesignaKnit and back to the Kniterate design app. Then I’ll finally be ready to knit the actual cardigan.
I still haven’t decided how I want to treat the front opening, and I’m going to wait on that.
To be continued. Later!
O!
If you’re a Kniterate user, you may be interested in my prerecorded Designing with Kniterate classes. If you’re not an owner yet, I’d be happy to give you a virtual tour of the machine.